Life in a cell
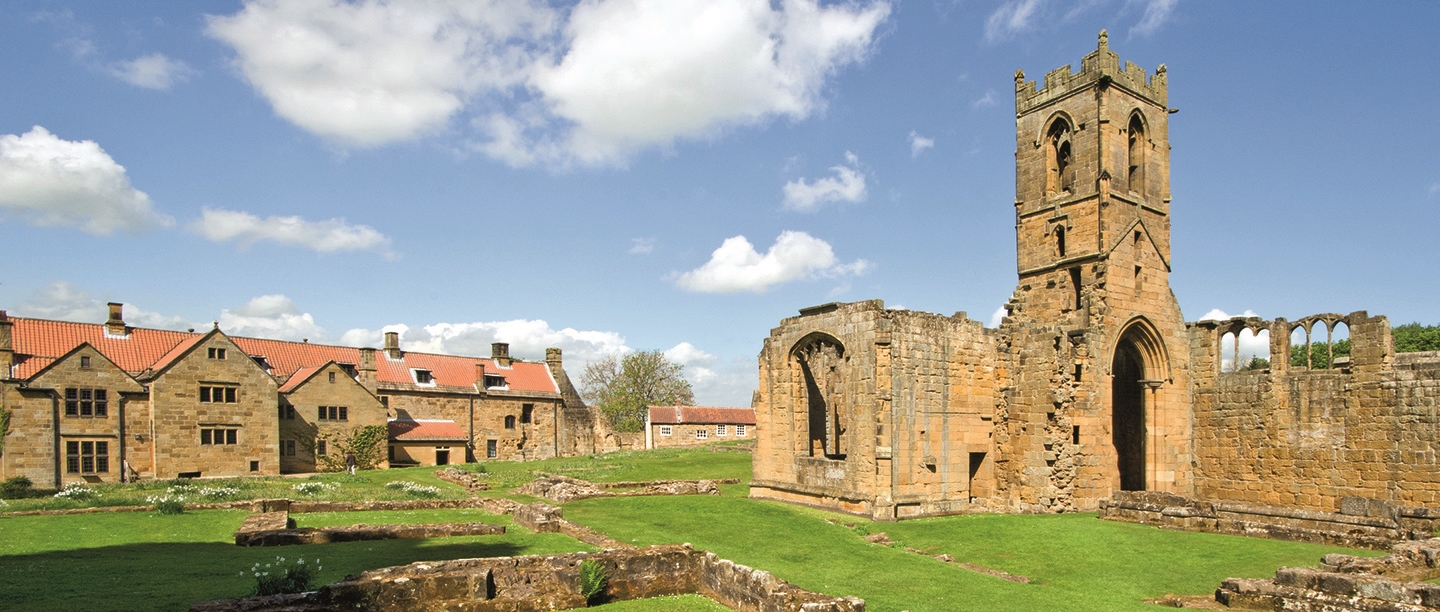
Mount Grace Priory in North Yorkshire is a monastery that was founded in 1398 by Thomas de Holland, who was the nephew of King Richard II. The lives of the medieval Carthusian monks who lived here were different to those of other monks. Each monk lived alone in their own house within the priory, which was known as a cell. The cells all had their own cloister for reading and meditation, as well as a walled garden. Mount Grace Priory had space for 25 of these cells.
The monks rarely saw each other spending most of the day in their cell, where they would say prayers and celebrate Mass. Servants, called ‘lay brothers’, brought food and drink to their cells, passing them through a hatch beside the door. The monks’ days were only different on Sundays and feast days, when they would eat together, meet to discuss business and discipline, and go to church together to pray.
Practical plots
Most of the cells at Mount Grace had a similar layout. The ground floor had a living room, study and a bedroom with an oratory (private chapel), while there was a work room upstairs. The cloister was formed from a short corridor between the cell and the garden. A second corridor led to the latrine (toilet), which was in the garden wall away from the cell.
The cell gardens at Mount Grace Priory allowed monks to do manual labour without leaving the confines of their living space. The monks grew herbs for use as medicine and for their aromas, as well as beautiful flowering plants that were designed to lift the mind and spirit. They could also grow vegetables in their gardens. Click below to find out more about monastic gardens and plant your own mini version!
Make a mini monastic herb gardenMake a Mount Grace Priory monk’s cell
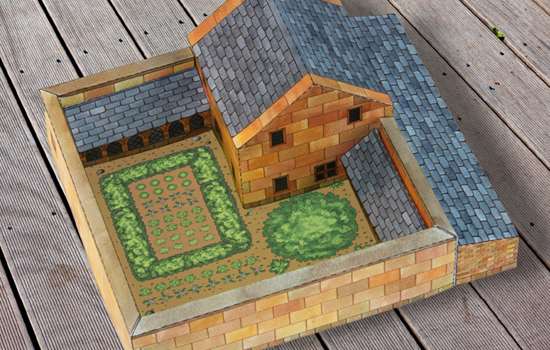
Now you can make your very own model of a monk’s cell at Mount Grace Priory. Ask an adult to download the template and print it out for you, then you can follow the instructions below to build the cell.
Once you’ve completed it, put your model on display to impress your friends – and tell everyone about how medieval monks lived in monasteries!
How to make your model of a monk’s cell
As well as the templates, you’ll need:
- Scissors
- Glue stick or double-sided sticky tape
-
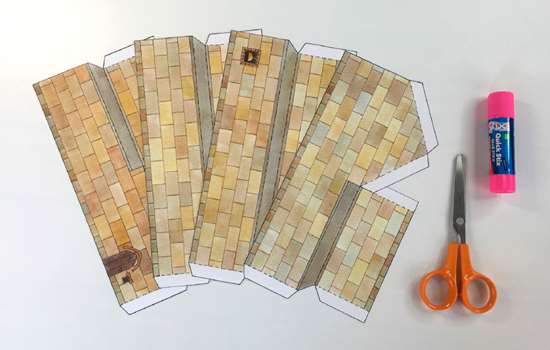
Step 1
Carefully cut out the four main walls (A, B, C and D) using a pair of scissors.
-
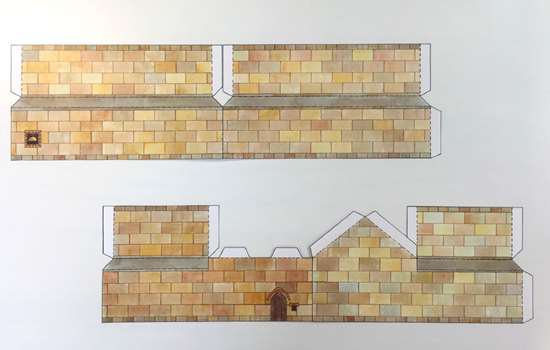
Step 2
Glue the four pieces together, in the order shown here, to create one long strip.
-
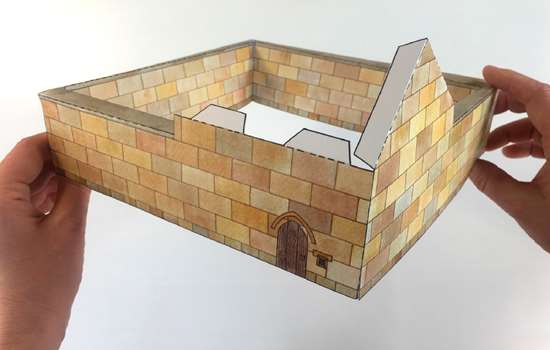
Step 3
Crease the dotted lines and fold the tops down to create the inside face of the garden wall. Put glue on the inner tabs and join each one to the one next to it to secure your walls in place. Bring the two open sides together, and glue them in place, to create a square.
-
Step 4
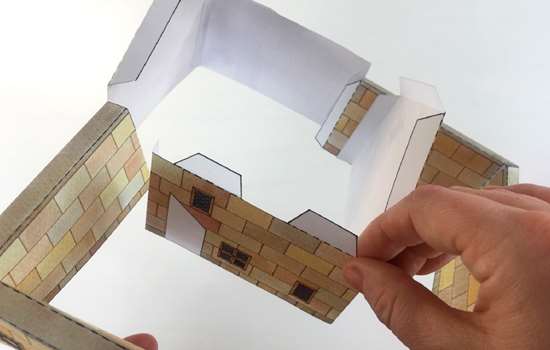
Fold the inner cell wall (E) in half and fold the tabs down at the top. Put glue on the side tabs and stick the cell wall in the corner of your garden, to create the main structure of the monk’s cell.
-
Step 5
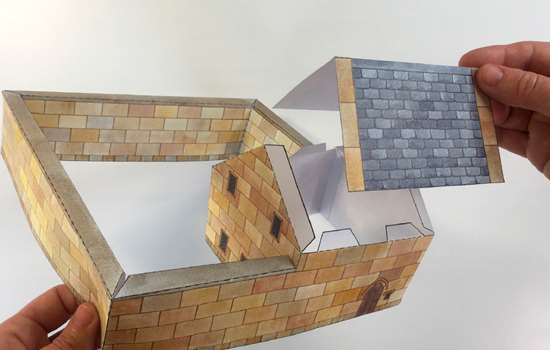
Cut out the roof (F) and fold it in half. Glue the roof on to the tabs to secure it in place. You’ll notice that your structure becomes a lot stronger once the roof is on.
-
Step 6
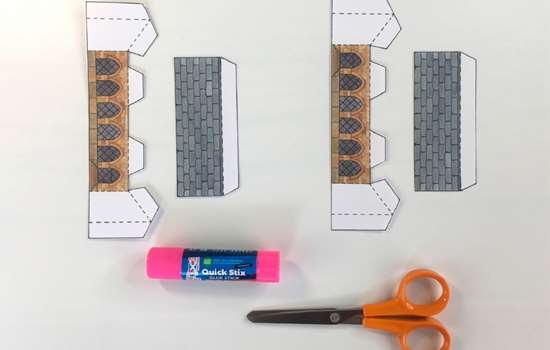
Cut out the two corridors (G and H), as well as the two matching roofs.
-
Step 7
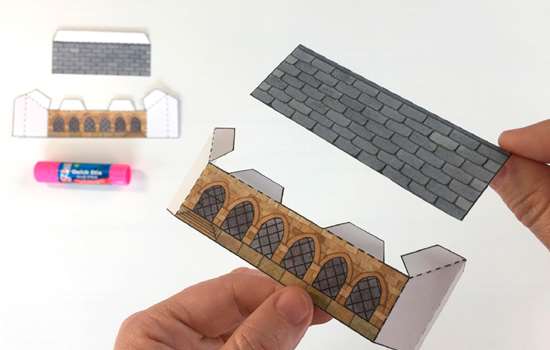
Fold along the dotted lines of the corridor walls and put glue on the top tabs. Stick the roof on to these tabs.
-
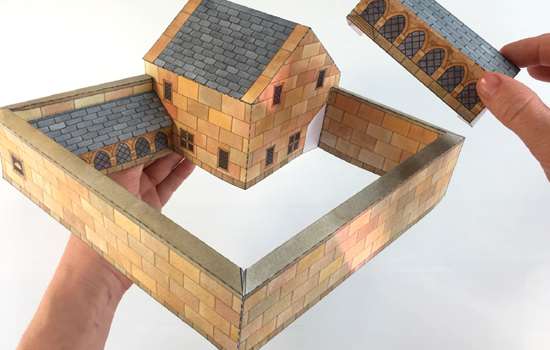
Step 8
Repeat for the other corridor. Put glue on the tabs and stick them in place on to the sides of the monk’s cell. There is an outline on the side of the building to show you where to position them.
-
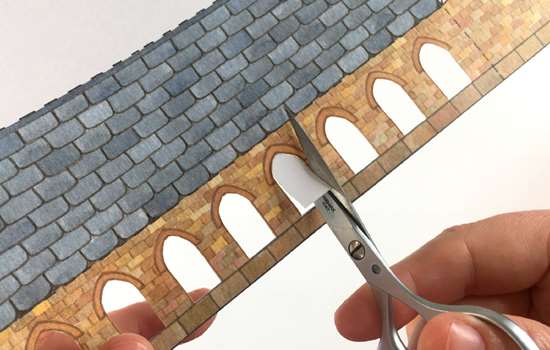
Step 9
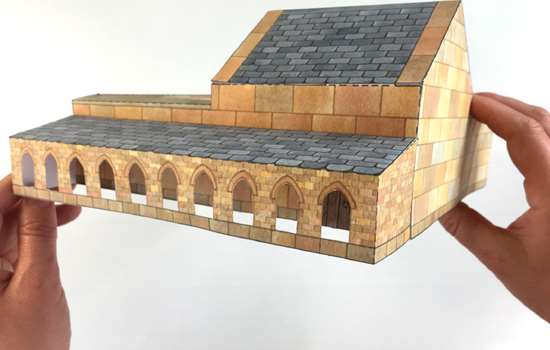
Cut out the exterior walkway (I). Using a small pair of scissors (nail scissors are ideal) cut out the windows.
-
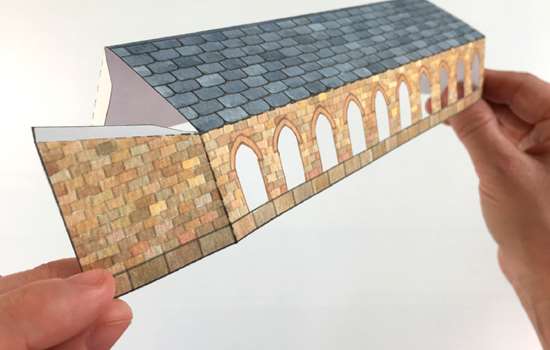
Step 10
Fold along the dotted lines and glue together to create the walkway.
-
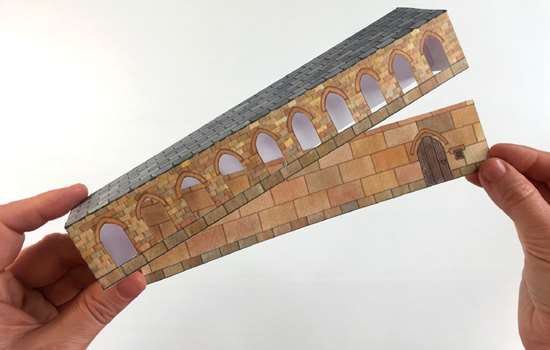
Step 11
Cut out the walkway insert (J) and slide up inside the walkway. You can see the door through the windows!
-
Step 12
Put glue on the back of the walkway and stick it to the outside of the north wall.
-
Step 13
Finally, cut out the base (K) and fold up the tabs on either side. Put glue on these and stick them to the inside of the outer walls to complete your model of the monk’s cell.

