A GUIDE TO THE BATTLE OF HASTINGS
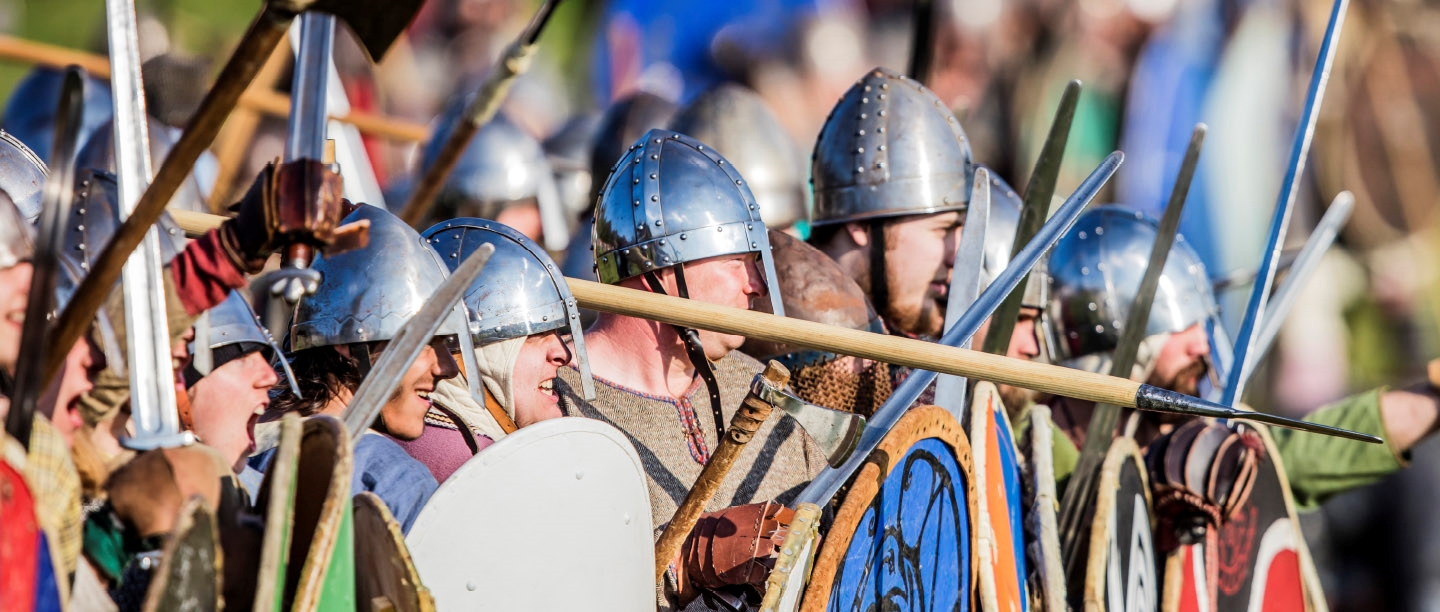
The Battle of Hastings in 1066 is one of the most important turning points in British history and every year thousands of visitors flock to Battle Abbey to see a thrilling re-enactment of the clash between the forces of William Duke of Normandy and King Harold. But there's more to the famous historic event than the battle itself. Watch our video explaining how chain mail is made, and read our guide to the key events leading up to, and during the battle.
How is chain mail made?
To ensure the realism of the 1066 battle re-enactment, our re-enactors take great care to make their outfits look as authentic as possible. From the weapons to the leather boots and armour, and even the chain mail – or 'maille' – which is painstakingly recreated, the troops on both sides ensure they look the part. You can discover how chain mail is made in this video.
Why did the battle happen?
The Battle of Hastings took place in 1066 because King Edward the Confessor died, leaving the English throne without an heir. Harold Godwinson seized the throne but he had two rivals: Harald Hardrada, a Viking king, and William of Normandy, who claimed that King Edward had promised the throne to him several years earlier.
English Heritage properties historian Richard Nevell reveals what happened next and the five key stages of the Battle of Hastings that led to the Norman Conquest and William the Conqueror being crowned as England’s new king.
1. Before the battle
The lead-up was frantic. King Harold had defeated the invading Harald Hardrada at the battle of Stamford Bridge near York on 25 September 1066 and marched quickly down to Sussex. Harold stopped in London to get more soldiers and, on the morning of Saturday 14 October 1066, his army of around 7,000 soldiers lined up on the ridge of Senlac Hill. To the south, Duke William of Normandy arranged his 7,000-strong army of Normans, French and Bretons.
2. The First Attacks
Trumpets sounded on both sides, signalling the start of the battle, and a hail of arrows followed. Harold’s army was a formidable obstacle: tightly packed, shield-to-shield, forming a wall. William’s force was arranged with archers at the front, foot soldiers behind, and cavalry at the back.
Attacking uphill, William’s foot soldiers and then the cavalry met the shield wall but were unable to break through. Harold’s position on top of the hill and orderly soldiers armed with two-handed axes looked to be decisive to the outcome of the day.
3. Rumours of William's Death
As the first attacks failed and fell back, panic sparked. A rumour spread that William had been killed and his army started to waver. In a pivotal moment, William rode out in front of his retreating soldiers. Lifting his helmet so that everyone could see his face, William shouted, ‘Look at me. I am alive, and, by God’s help, I shall win!’ When the Norman army threatened to crumble into disarray, William had brought them back from the brink.
4. The Feigned Retreat
Seeing the foot soldiers and cavalry retreating, some of Harold’s army followed them, hoping to catch them on the back foot. This split the army, gave up the high ground and broke the shield wall. William turned his rallied troops and routed the Saxon counter-attack. The Normans pretended to retreat twice more and both times part of the remaining Saxon army fell into the trap, marching down the hill only for the Normans to turn and attack.
5. The Decisive Moment
Though the English army had sustained greater losses than their Norman counterparts, they still held the top of Senlac Hill. The Bayeux Tapestry famously shows that the Norman archers had a decisive role: one of their arrows struck Harold in the eye, though it is the only contemporary source to say that Harold was struck in the face by an arrow and there is no evidence to confirm this.
The Normans now began a last fierce assault. Leaderless, and lacking hope, the Saxon forces finally gave way and fled.
See the battlefield for yourself
On this spot in the year 1066, the armies of King Harold and William the Conqueror clashed at the Battle of Hastings. Why not plan a visit to stand on the very site where this decisive struggle was fought and England’s future decided?
Explore abbey ruins and meet the Normans and Saxons on our sculpture trail. See the new gatehouse exhibition revealing the abbey’s role in the country’s future, then head to the roof for stunning views of the battlefield. Allow the stories of battle to unfold and discover its atmosphere for yourself.
-

October 2018
-
July 2018
-
May 2018
-

March 2018
-

October 2017
-
July 2017
-
May 2017
-

March 2017
You may also be interested in